
For the budget saavy artist who needs to get a good digital image of their artwork, here are a few tips to help you get the best image possible using a regular digital camera or smart phone. This is also how I catalog my artwork on my social media art sites.
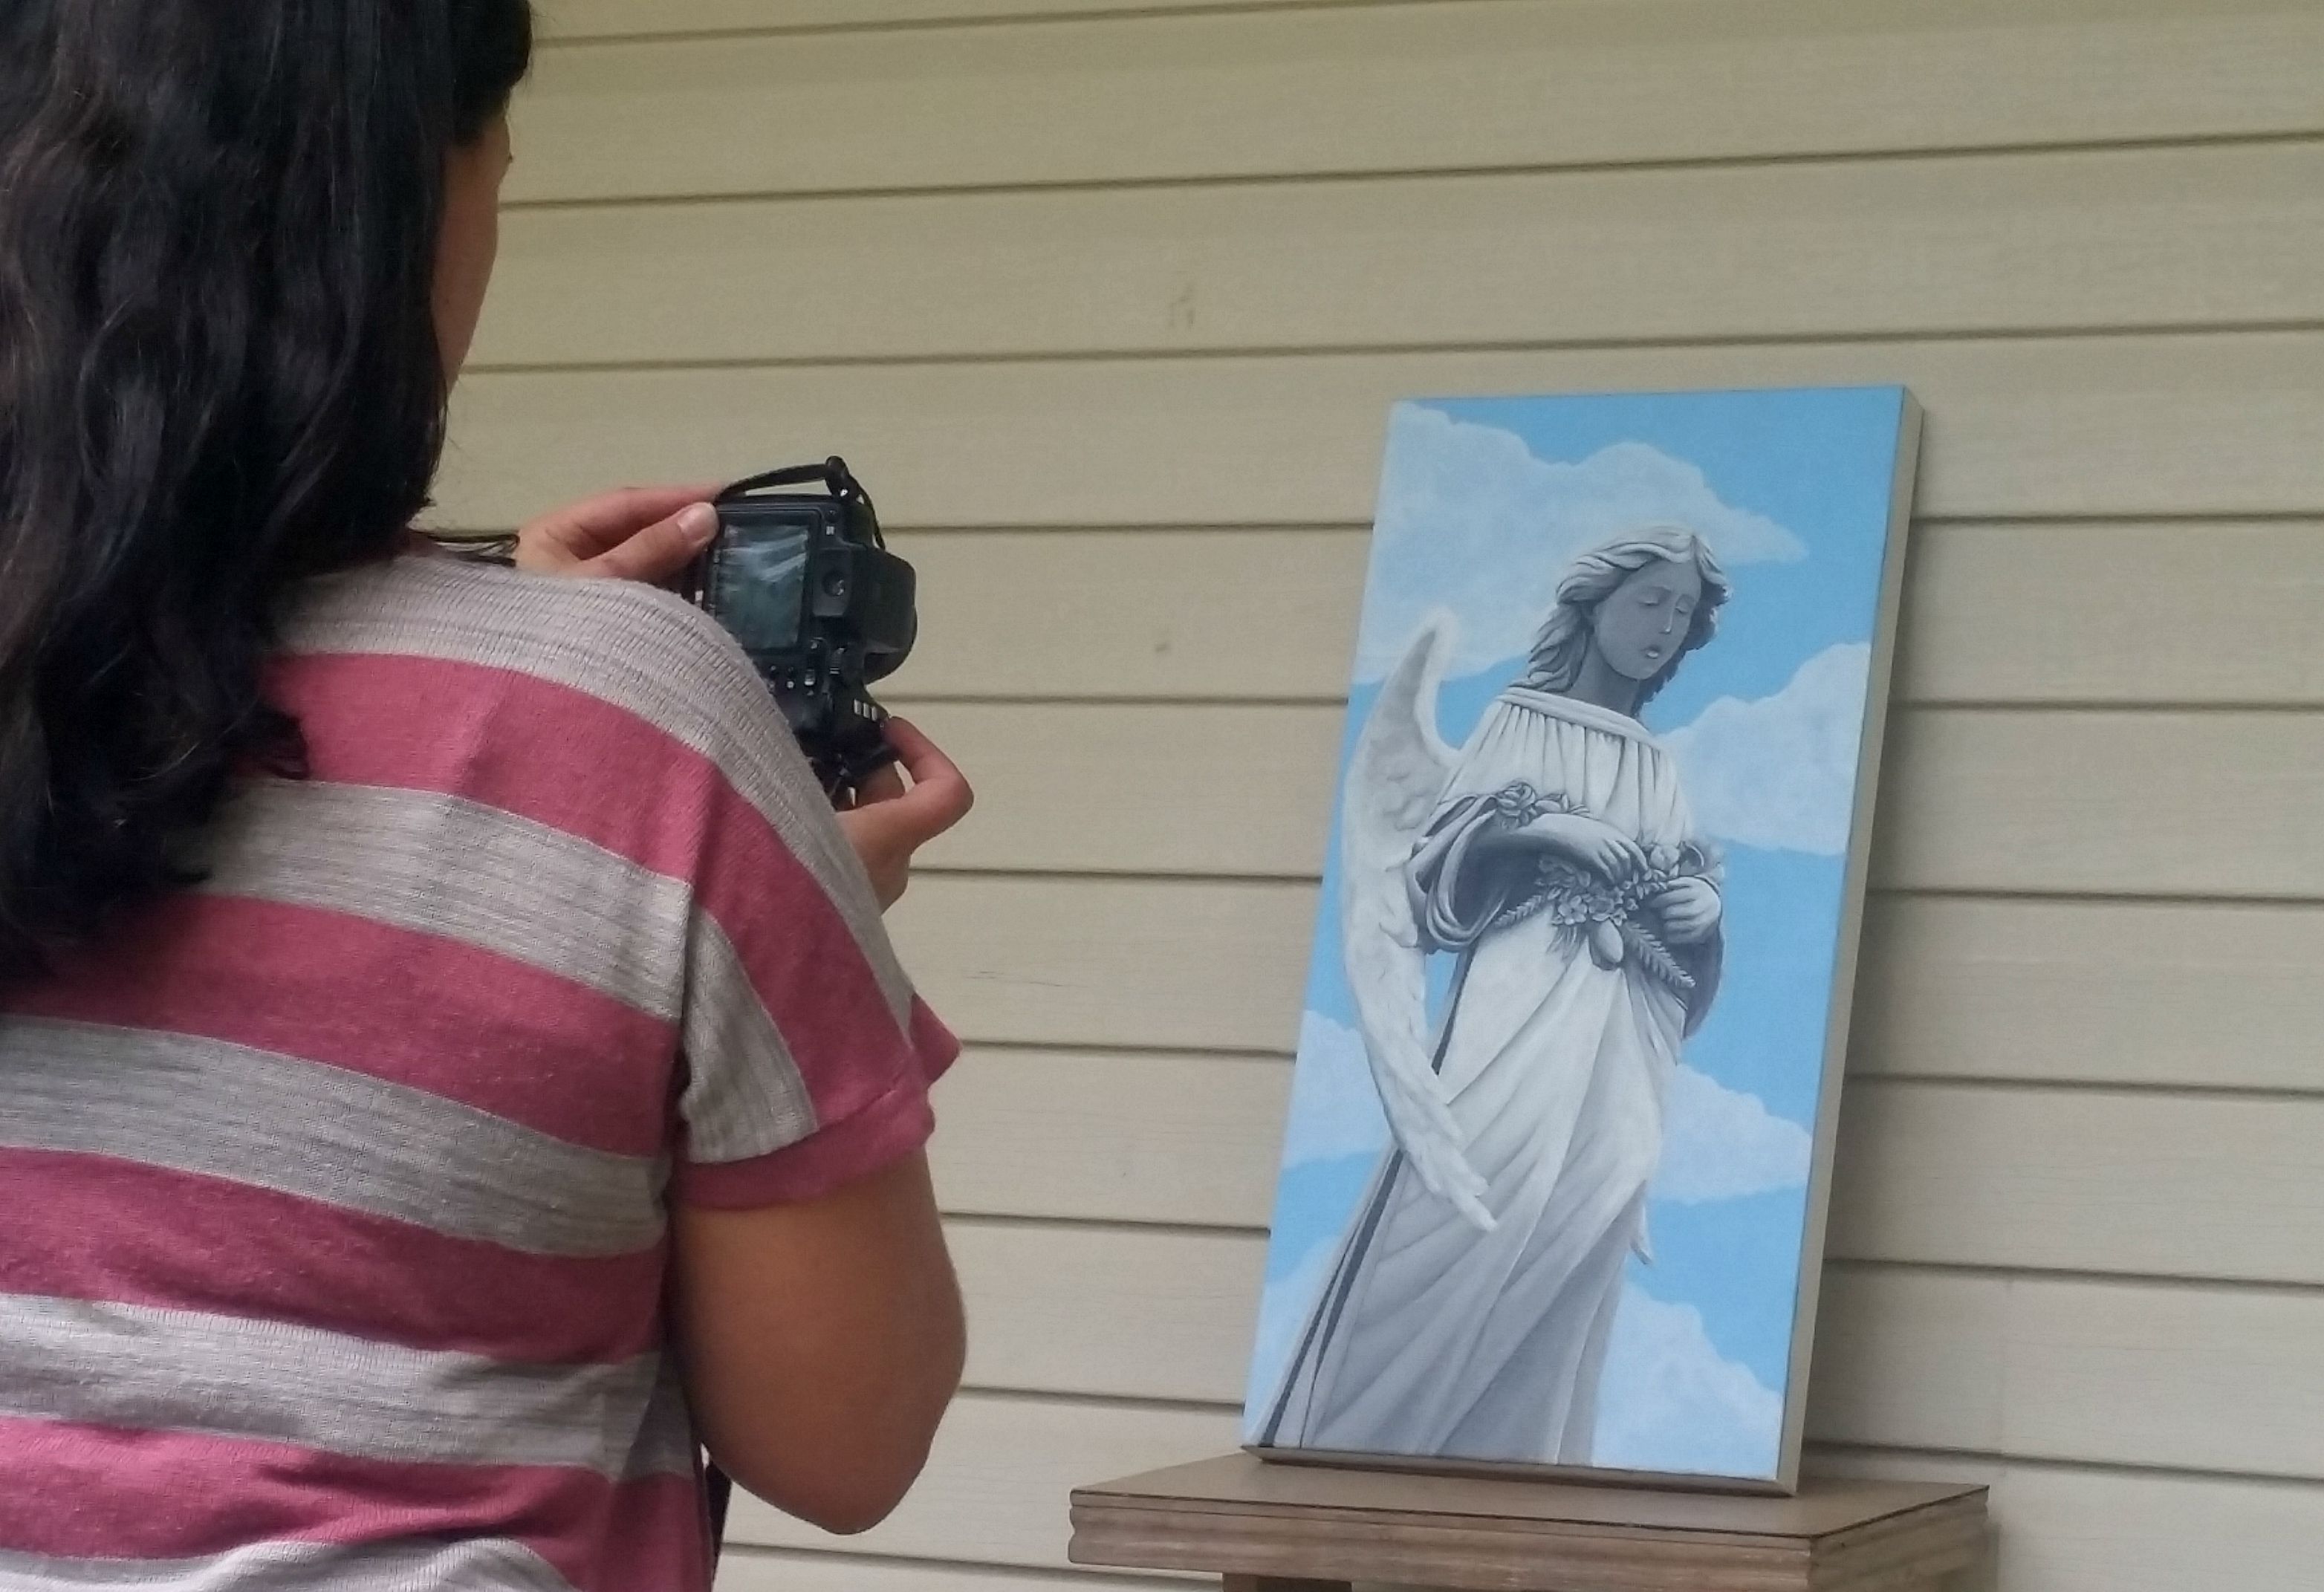
The best way to get started is by finding a well lit area with natural light. I have found that working outside on my porch was ideal because it was well lit on three sides and had a roof above to help keep any direct sunlight off of my art that would either produce a glare or wash out the piece too much. Another tip is to shoot on a day when it is overcast. If the clouds are too gray, like say it is about to rain, this will end up taking away from your light source. I recommend a nice overcast day with plenty of light filtering through the cloud cover. A sunny day sometimes is just too much light and causes shadows to appear across your artwork or it saturates the colors too much, changing the composition completely.
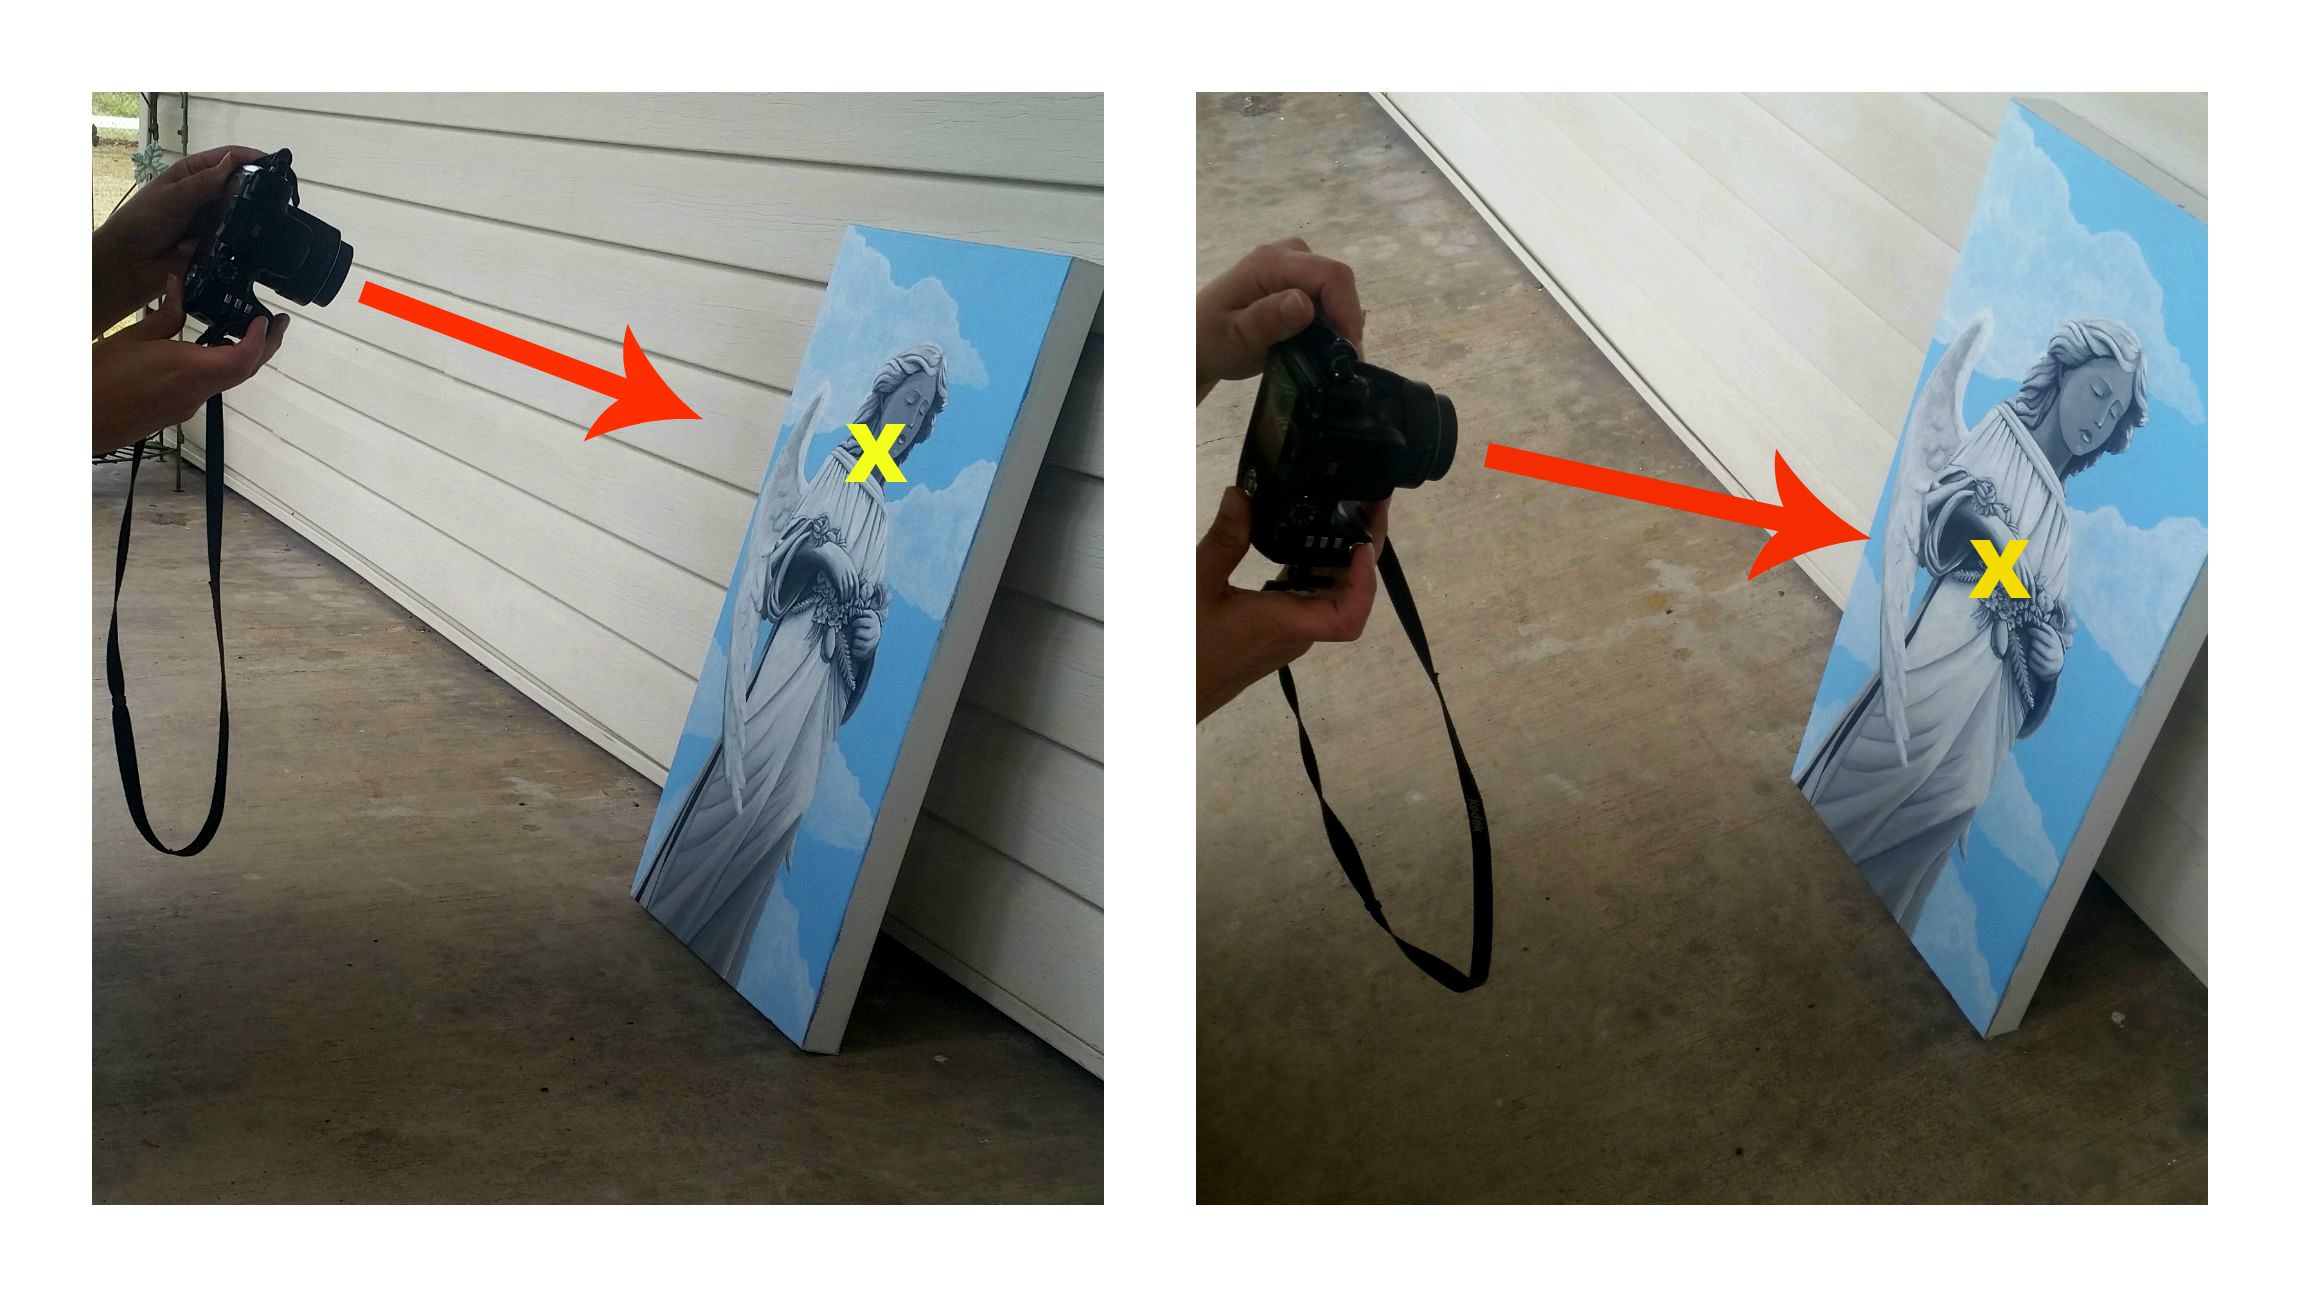
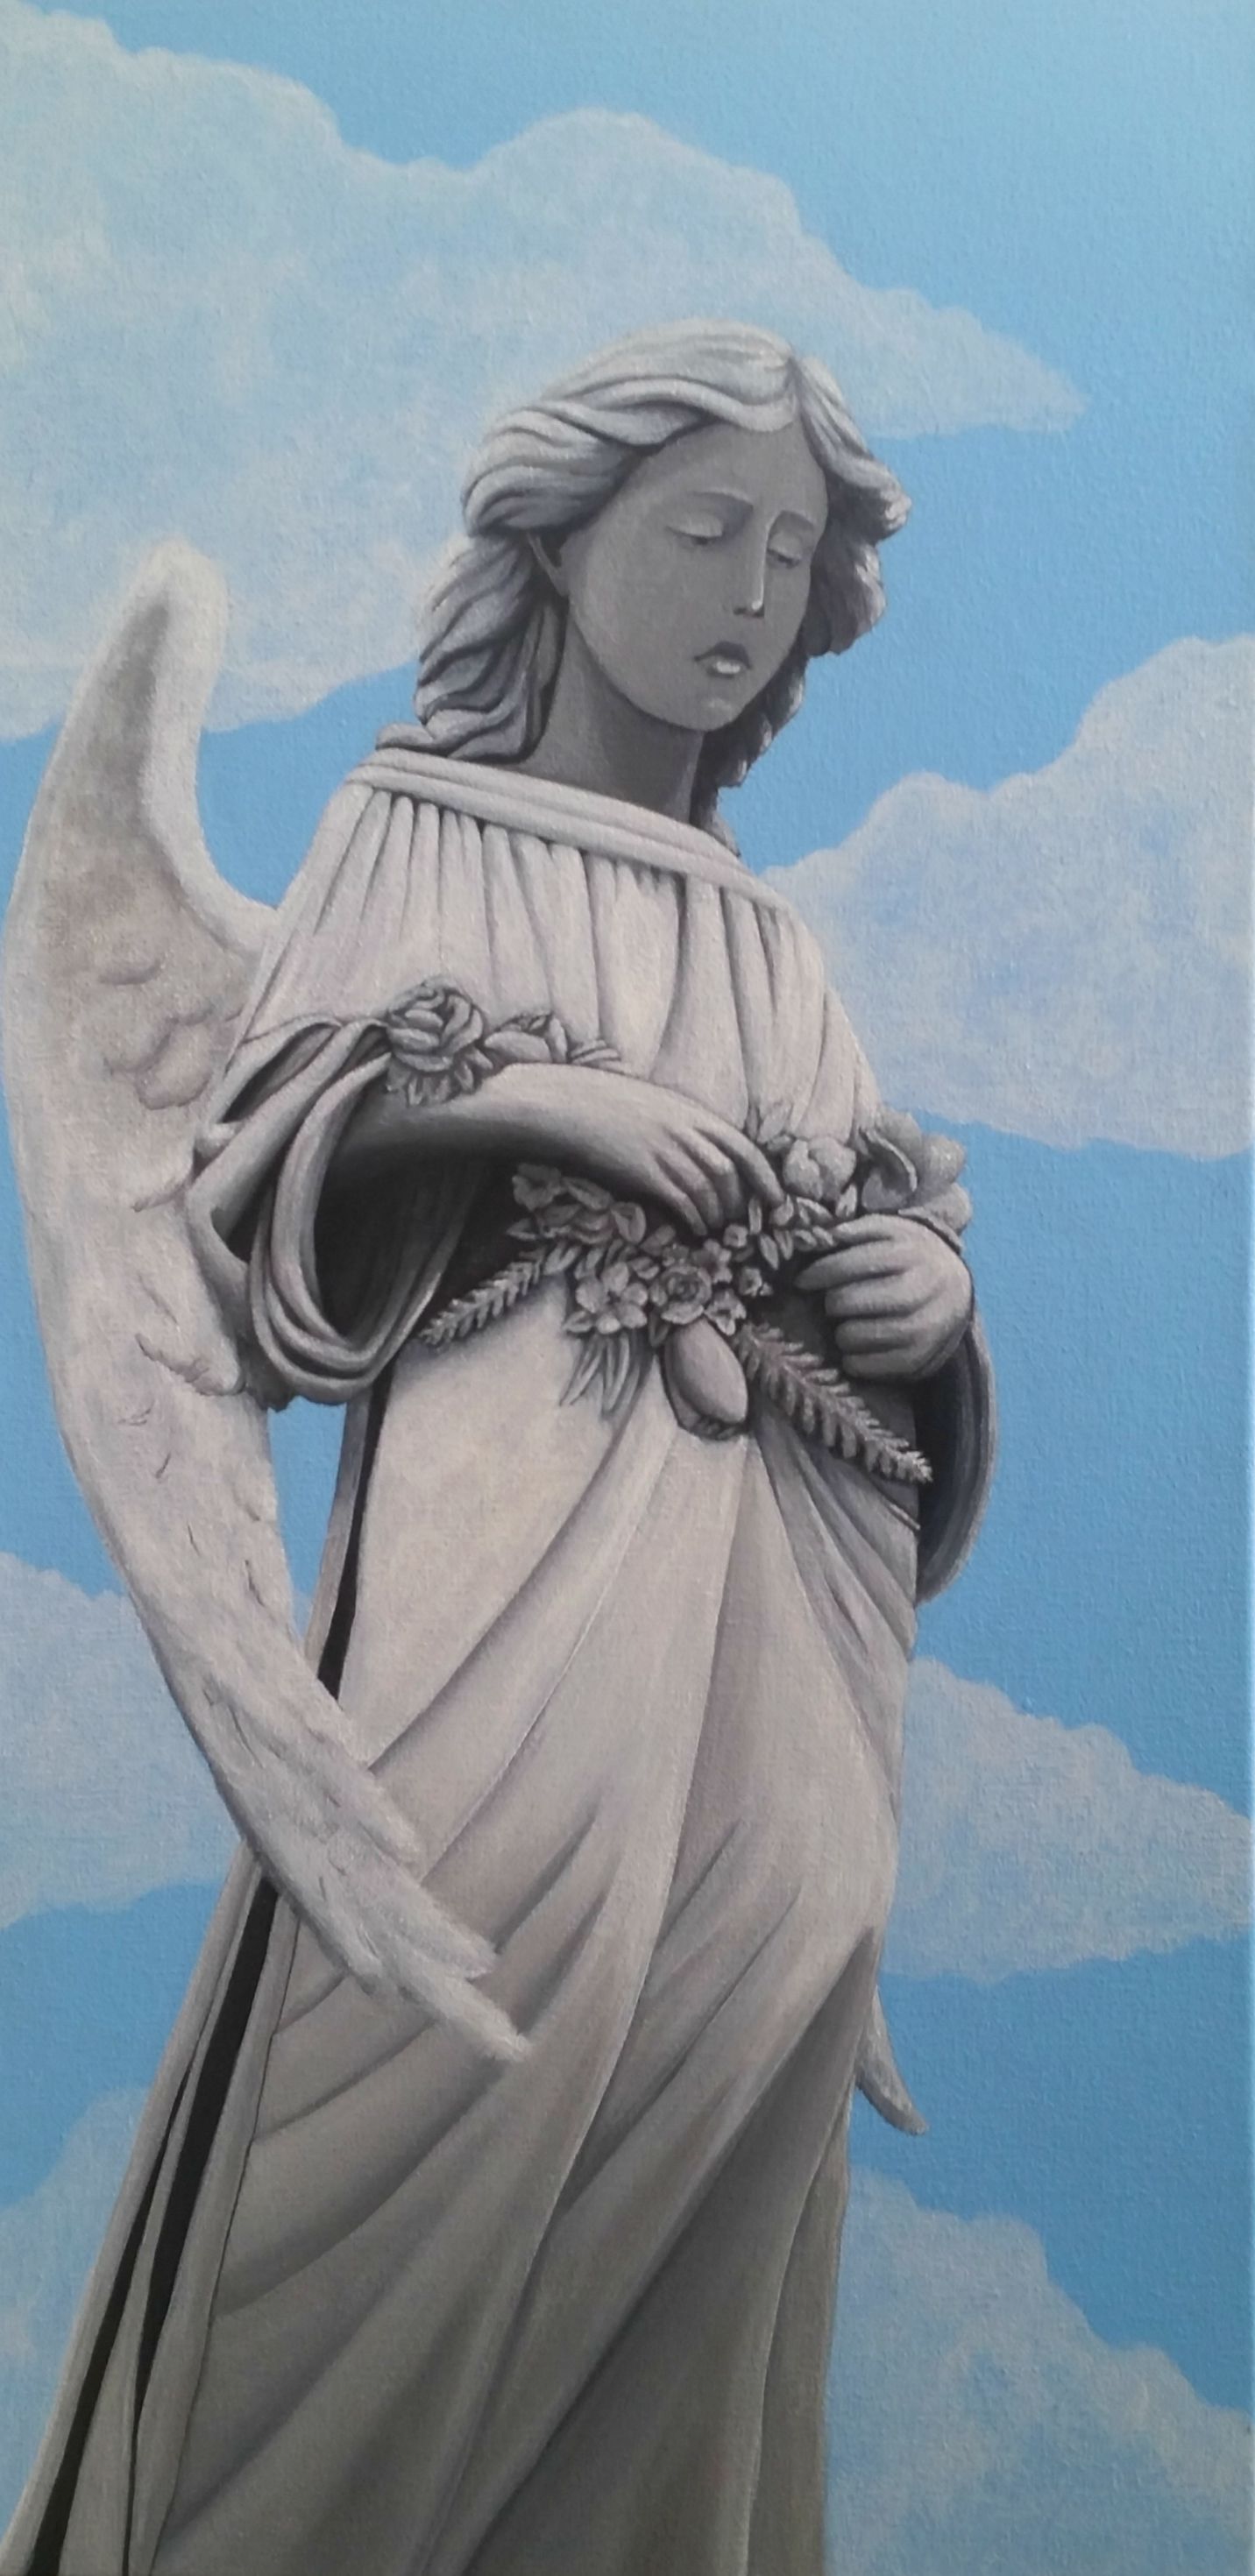
Next you are going to want to center yourself with the artwork. You never want to shoot up above or below the art. You are going to need to aim your lens right at the center of the artwork. In the diagram above, notice how in the left image, the camera is shooting above the middle of the painting. This will distort the image, making the head of the angel appear slightly bigger than the rest of the body. The picture on the right is shooting at the center of the painting, making sure not to distort the size of the details and giving you a good replica of the original design. Also make sure to turn your flash off to prevent any additional light glare on the surface.
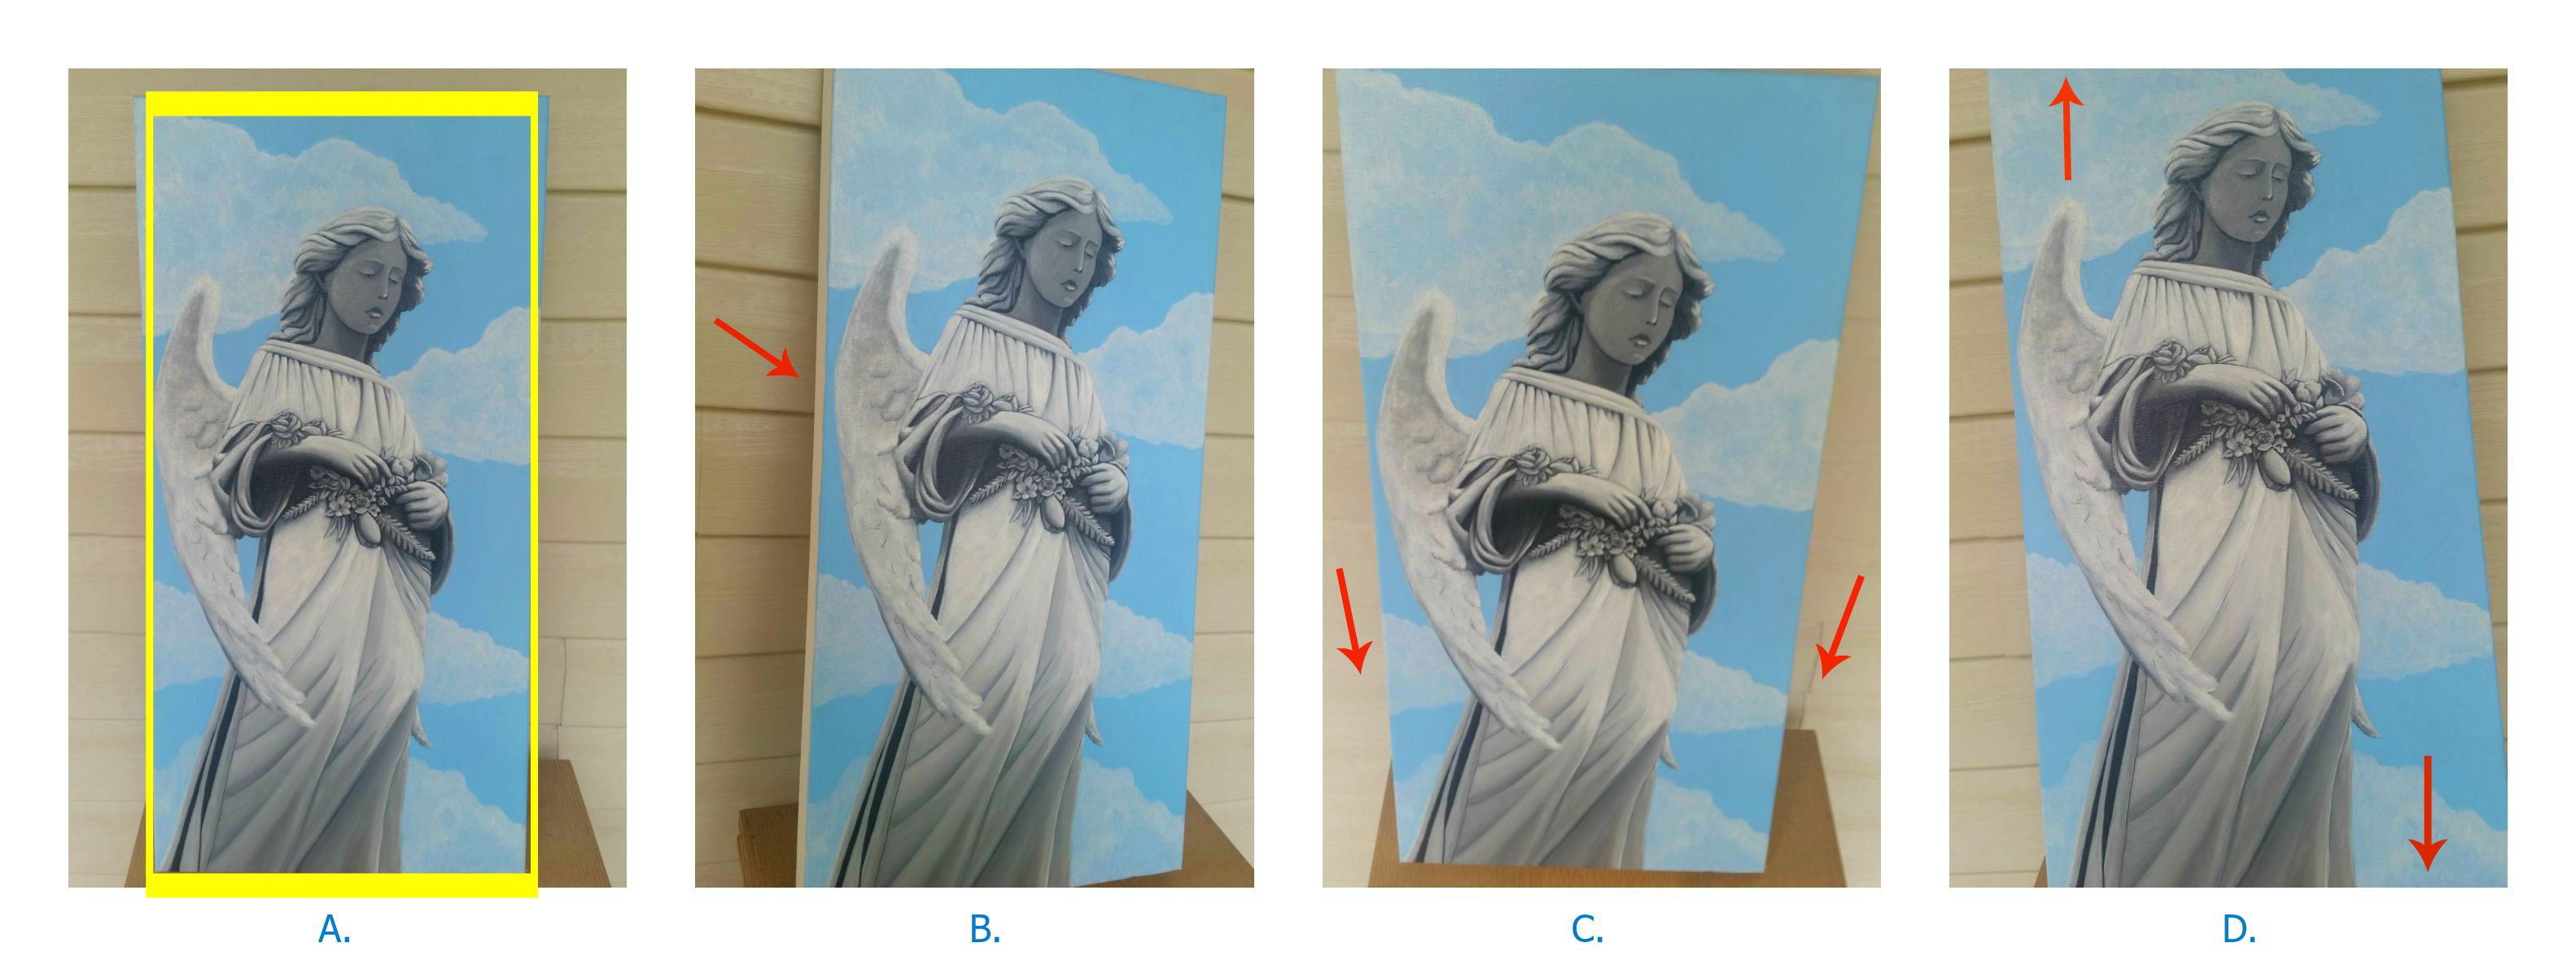
Now that you know where to aim your camera, here are a few tips to help when shooting a good photo. Some people may tend to miss these tiny details when using a camera but this is going to help you get a great shot without cutting anything off. In diagram A. the yellow box around the painting is showing you how square the image is to the edges of the photo. As you can see here, mine is not as perfect as it should be. I usually tend to take many photos similar to A. and then look them over on the computer and choose the best one. Use the frame of your view finder on the camera to help you line up the edges with one another. Sometimes it can be slightly off and this will make the edge of your painting not parallel with the edge of the photo. Don’t worry about capturing any background in your photo, you can go in and crop the image with photo editing software later to cut out any unwanted background. Just focus on centering the photo at the moment and get in as tight as you can on the image without cropping off any of the edges.
In diagram B. the side of the canvas is showing so you know that this photo is not centered. Diagram C. has an overhead view, meaning the camera was held up too high and diagram D. the camera was held too low. Some of these incorrect photos such as diagram B. and D. also have carelessly cut off some of the top and bottom of the painting as well. These examples are here to help you not make these same mistakes!
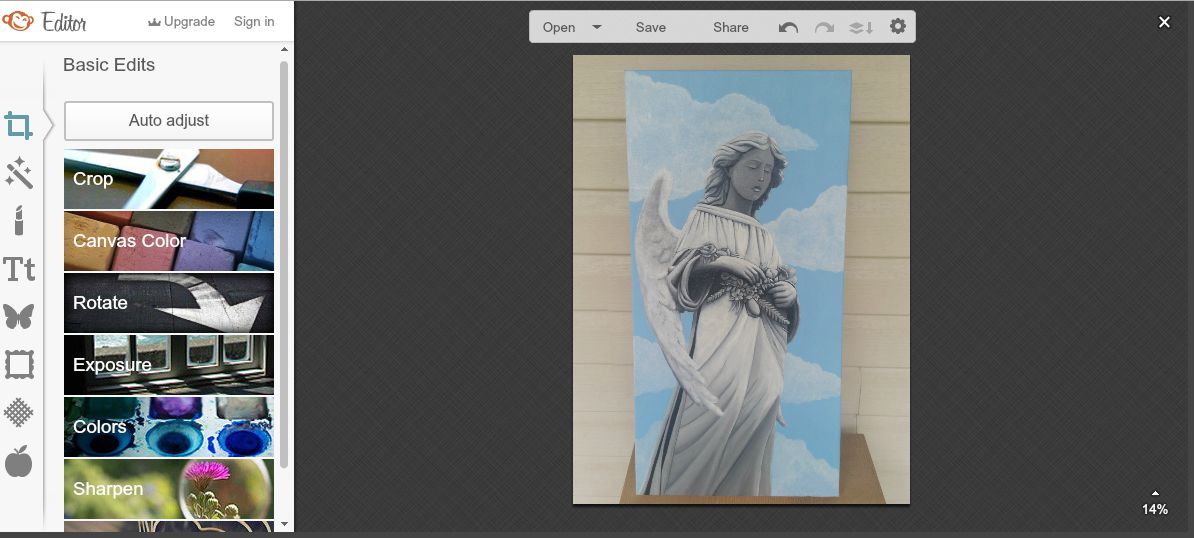
After you have taken your photos, upload them onto your computer and choose the best photos for editing. Many computers come with photo editing software installed, and there are others out there for purchase, but if you do not have any decent software, there are plenty of online photo editing sites that are free. Pictured above is Pic Monkey, a free online photo editing site that I have enjoyed using for my personal stuff for years. It is very easy to use and you can also upgrade for a small fee to unlock other great filters and features. The photo above is ready to be edited. I will crop out the background and adjust the colors to fit the original painting as close as possible.
You can adjust the exposure and bring out shadows. Sometimes when shooting outside, the colors may get a little washed out so you can easily tweak your photo to get the rich tones put back in. Another tip is to be cautious when photographing black painted surfaces. Sometimes the black paint tends to reflect the light and it becomes difficult to edit if you do not have Photoshop. And that should just about wrap it all up.
Leave a Reply